Hey, everyone! It’s been a minute since I last wrote an update. After getting home from Blender Con, I’ve spent the past month working on a new trailer for the film with my assistant, Adrianna!
To make this happen, I had to get several of the other scenes up and ready to render in addition to actually animating the shots in question.
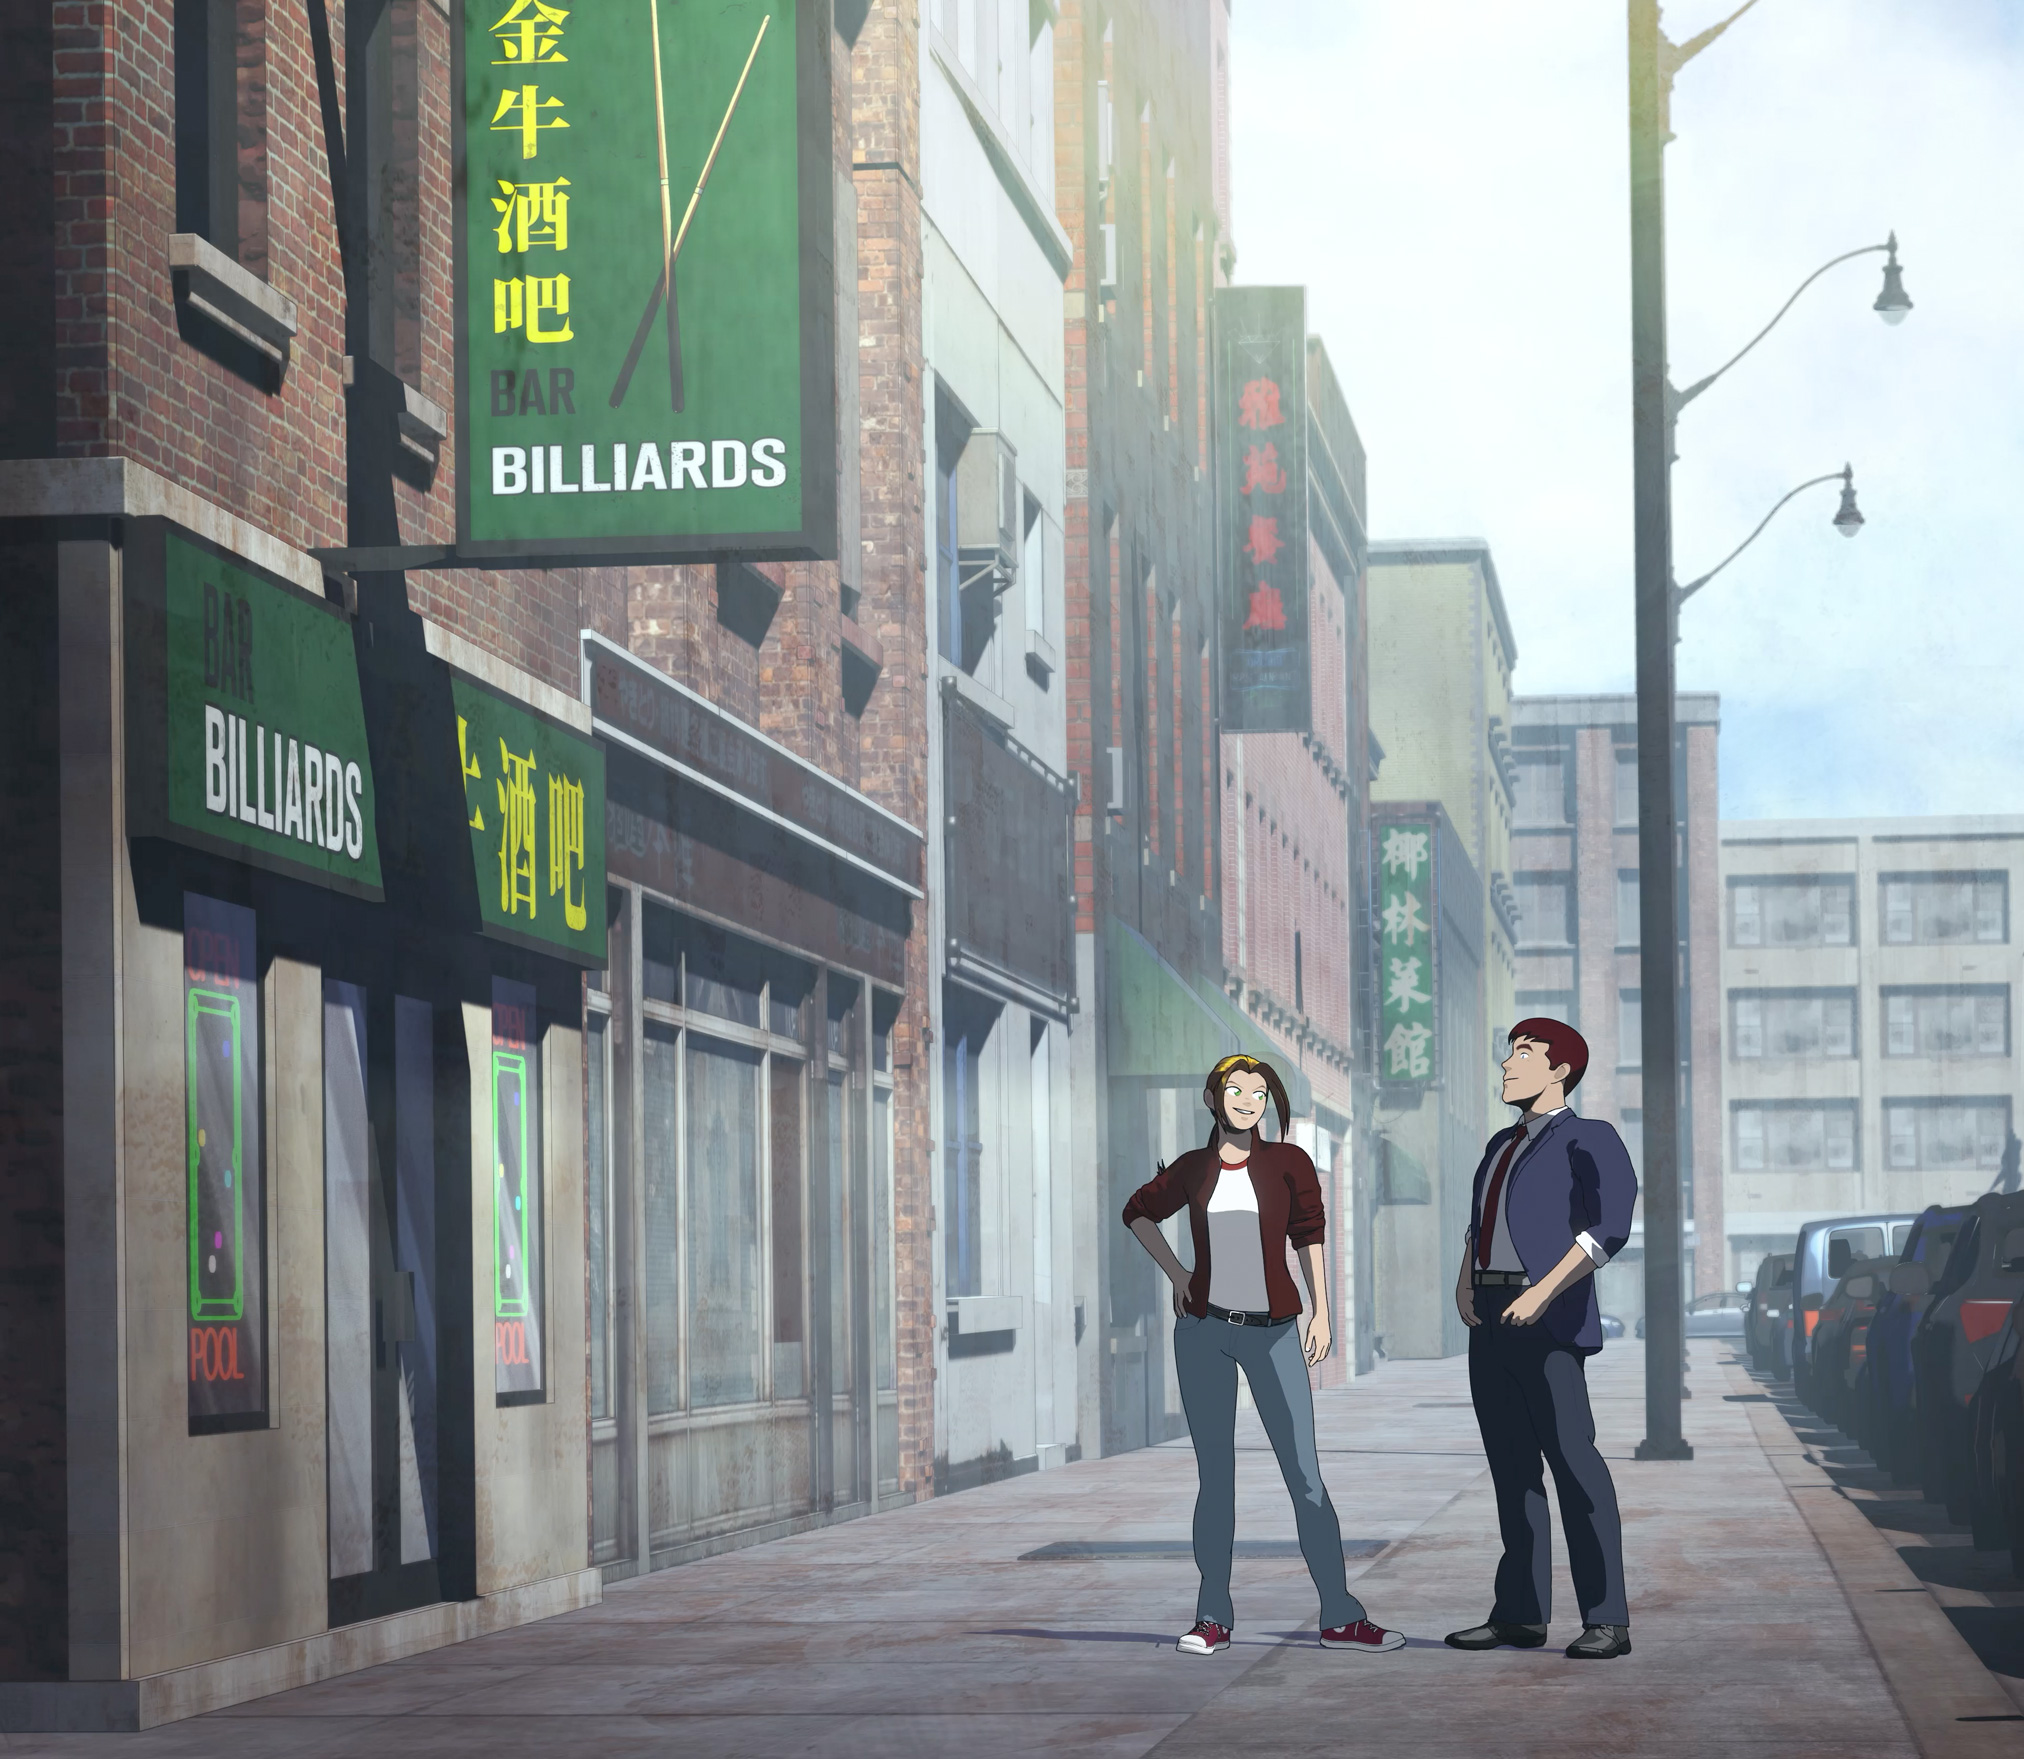
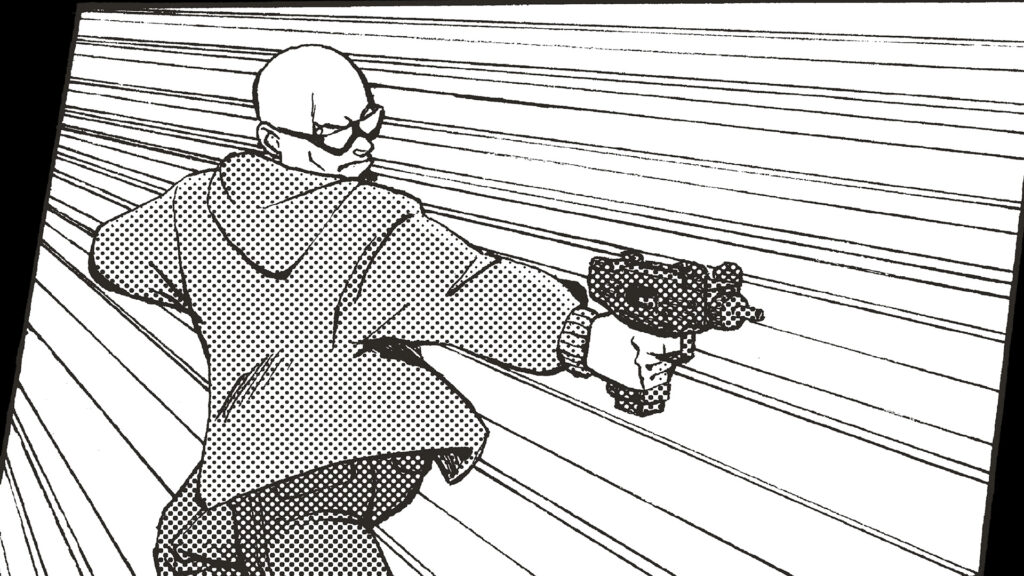
Matte painting for the opening shotSo much talking! These shots are really fun to animate!Using video of Dayeanne from the rehearsal to inform Kate’s performance.Street scenes are definitely one of the more challenging things to render! This shot took a bit of touchup in After Effects to complete.
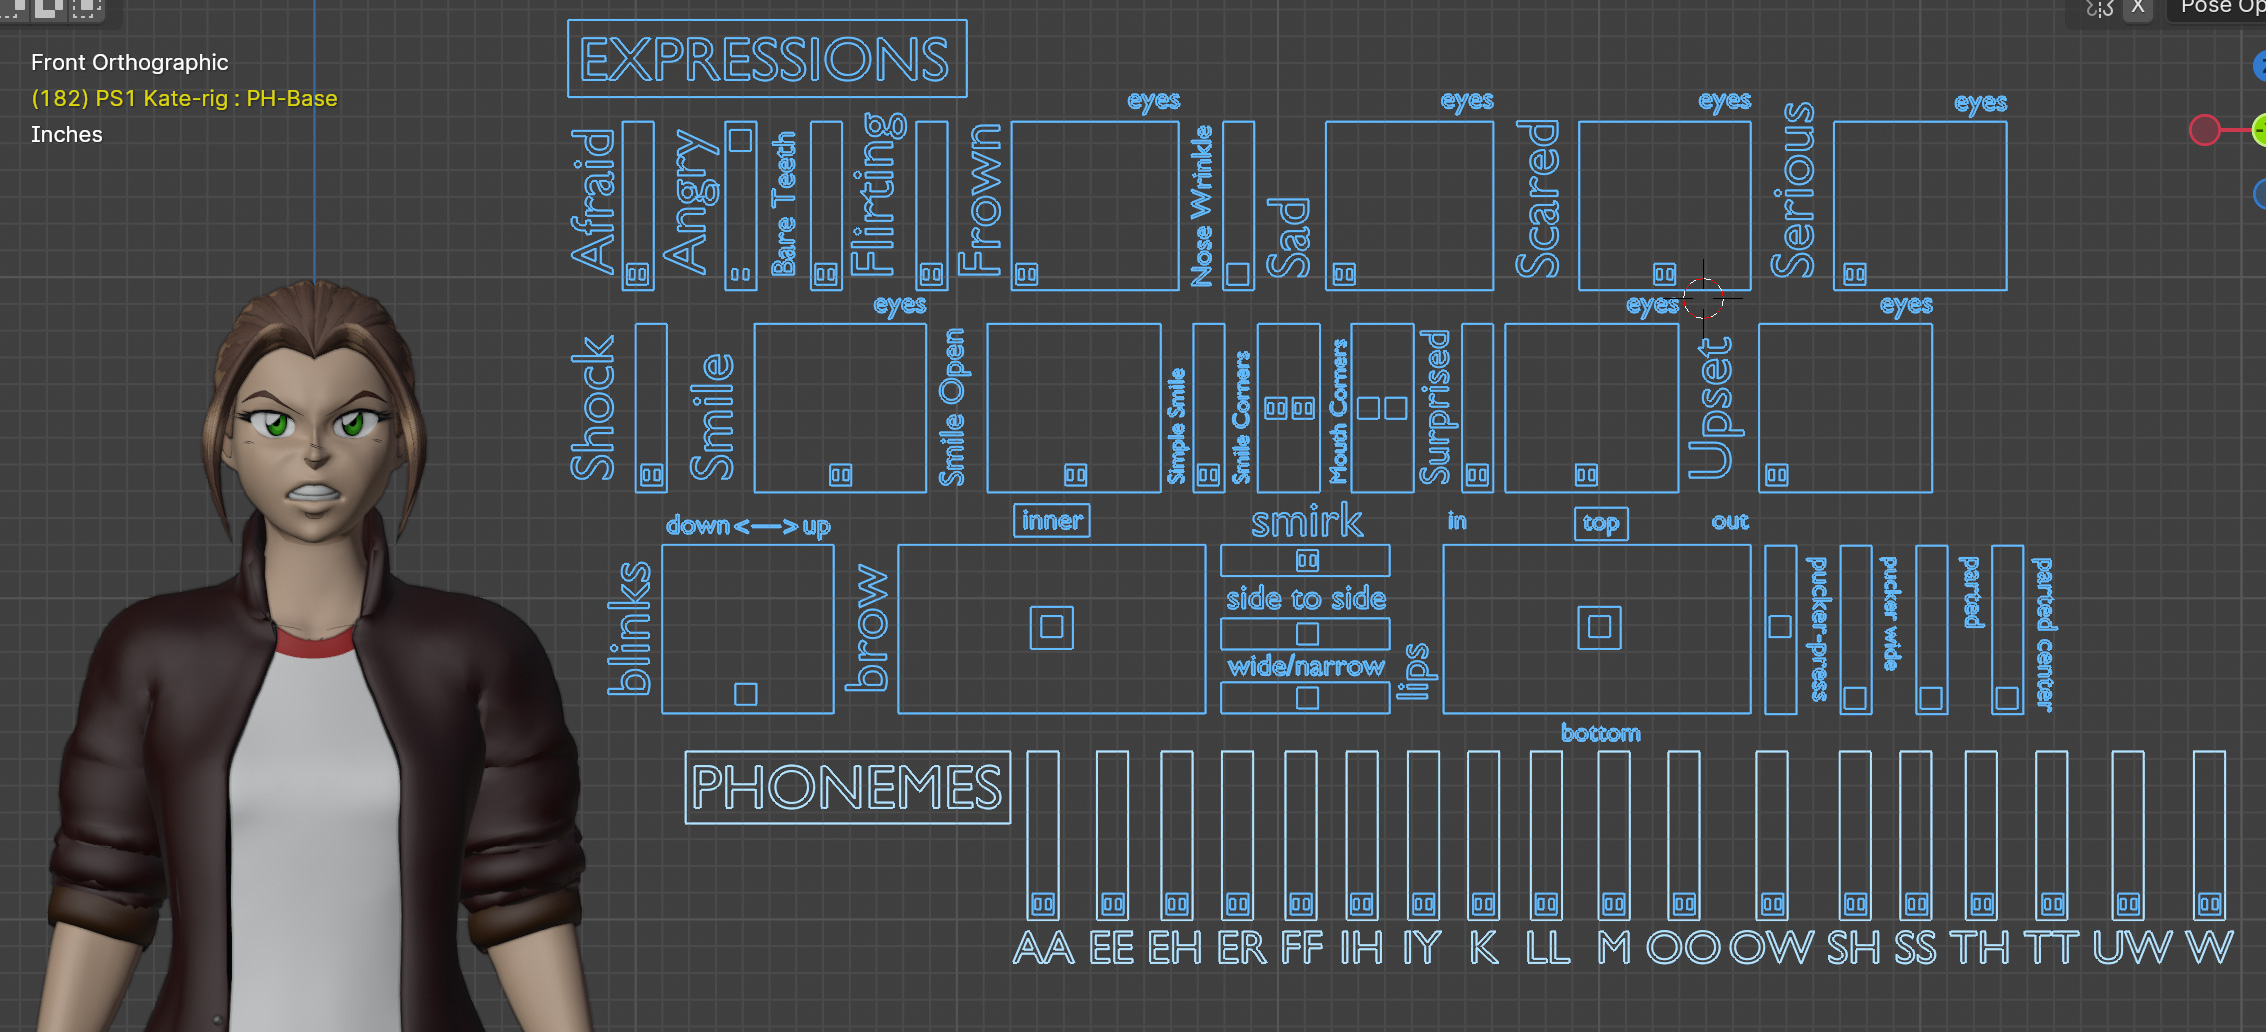
I also spent a couple of weeks up front doing some quality of life upgrades to the main character rigs—Kate, Mike, and Kuan—who have most of the speaking parts in the film. The hope is to cut down on the amount of touchup I need to do for all the talking shots, especially around the mouth and eyes. It’s getting closer, but honestly Nina and I are probably going to spend the final month of production on clean-up for all the dialogue scenes we have coming up.
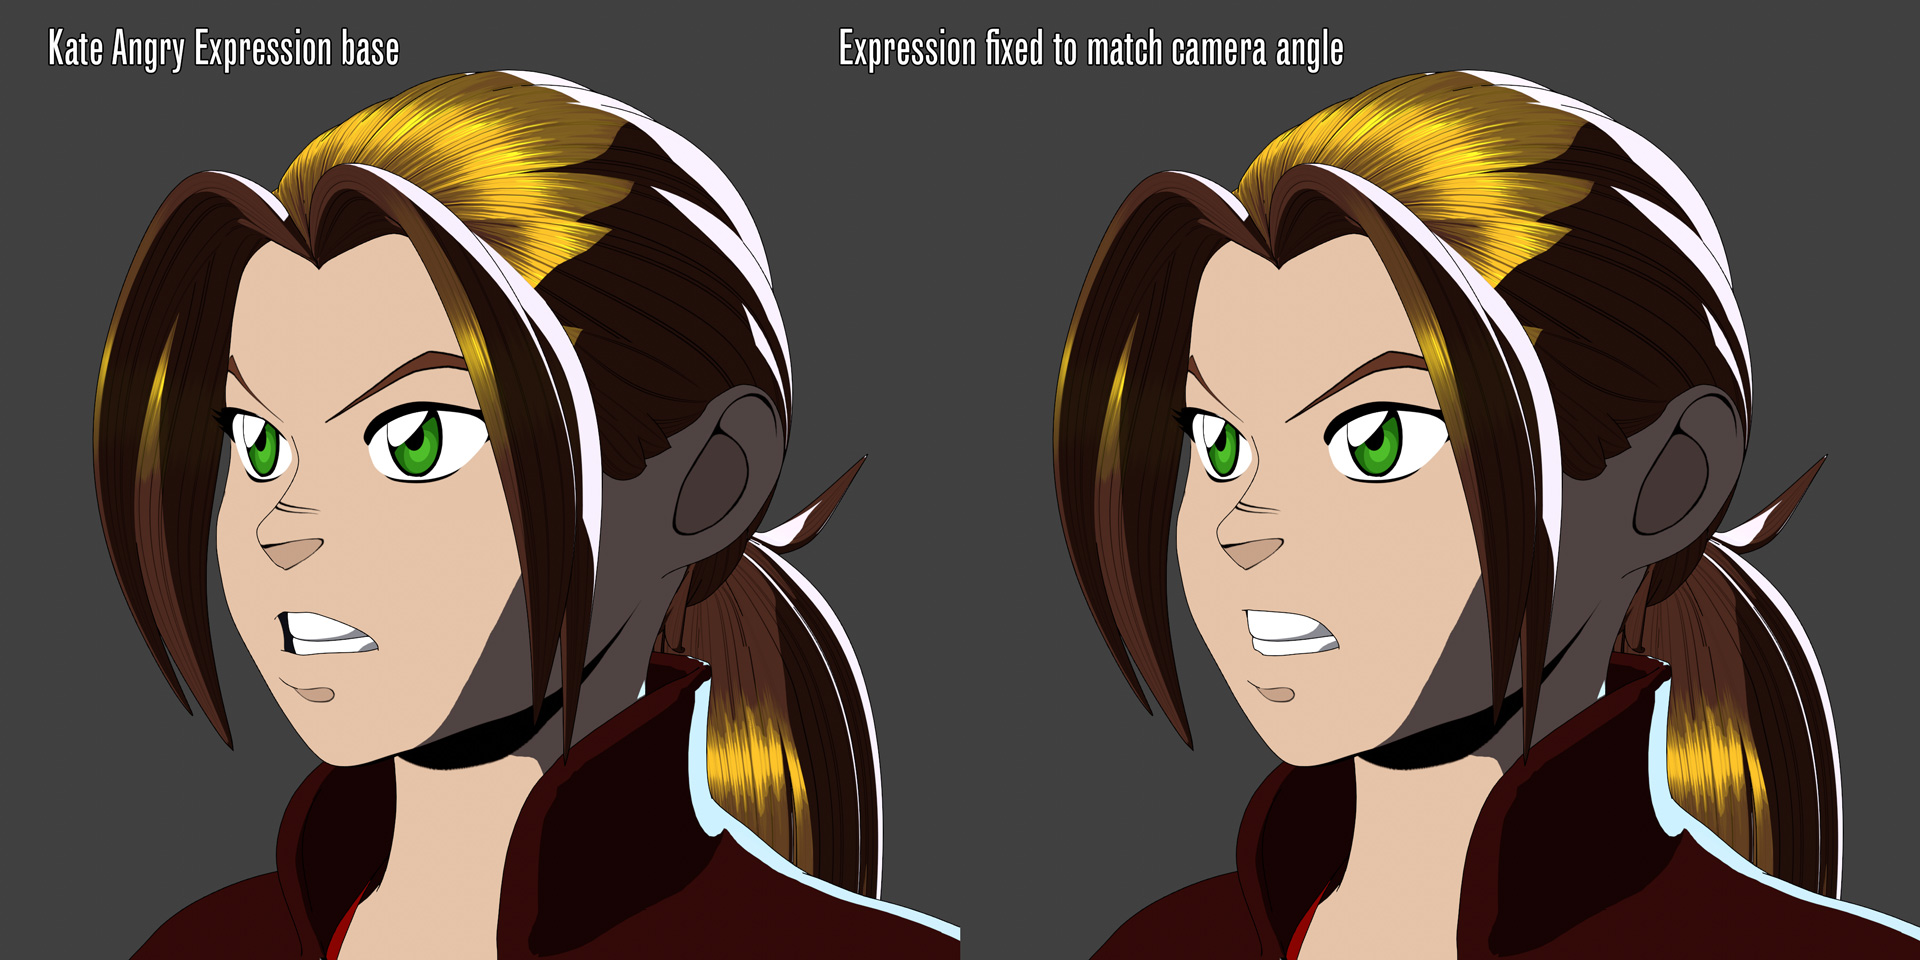
Note Kate’s mouth. To get it to look right in each shot, I would have to redraw over every frame. Except now, I made a control that fixes the mouth from certain camera views so I don’t have to redraw it by hand!But multiply that fix across literally dozens of facial controls on multiple characters, and you see why it took a couple of weeks to implement. Hand painting corrections in After Effects. (BEFORE)Adding touchups with the paint tool. This has to be done frame-by-frame. (This shot is 108 frames long!)Finished frame.
Here’s the raw composite without the frame-by-frame cleanup:
It’s okay, but her mouth looks a bit to “Charlie Brown”. The lines are wobbly and some of the mouth shapes aren’t right.
Here’s after the correction:
Of course, this took a whole morning to correct one shot. I’m hoping the fixes I’ve made to the character rig will cut down on the need to do this going forward!
I just finished an incredible week at the Blender Conference in Amsterdam! Getting a chance to mingle with so many amazing artists, animators, and technical people was an absolute joy, especially since I’ve been learning from and taking inspiration from so many of them over the past few years, But on top of that, I got to present my animation work on Paradigm Shift: Chinatown in a 20 minute talk!
The response at the conference was overwhelmingly positive, and I had people approaching me to talk for the rest of the week (including incredible artists and animators whom I have tremendous respect for… WOW!)
You can watch it here:
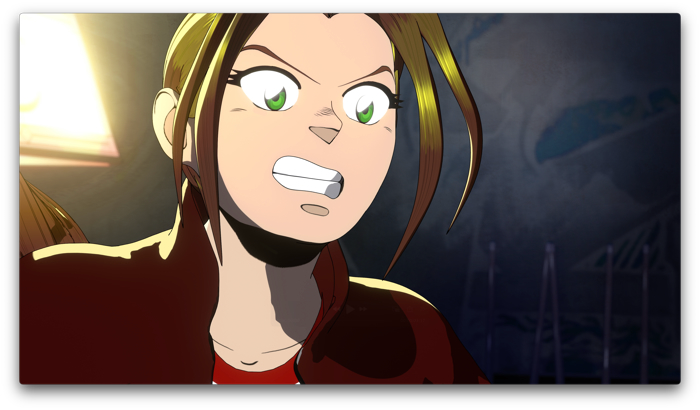
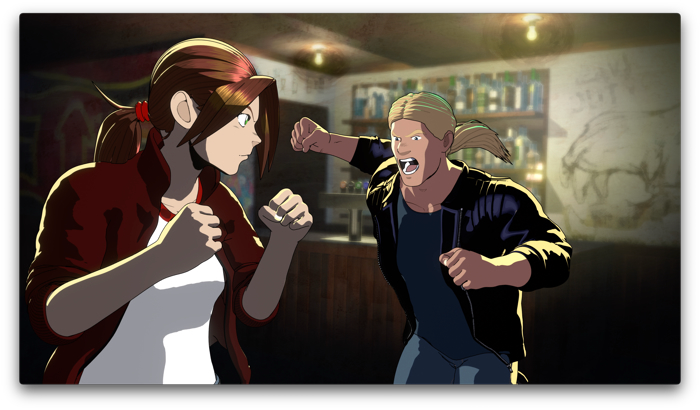
Before I left for Amsterdam, film production has been moving forward steadily, and we crossed a major milestone: I finally got the final dialogue recordings from James and our voice cast! I’m overjoyed with the performances, and I know you’re going to love them! Dayeanne is amazing at bringing Kate’s feral energy to life, and Zach totally nails Mike’s cool demeanor. I’ve already got a new rough cut of the film together based on the final dialogue, before leaving on the trip I spent the last few weeks going back through the scenes I’ve been animating all summer to update all the dialogue shots to reflect their performances! It’s been incredibly fun!
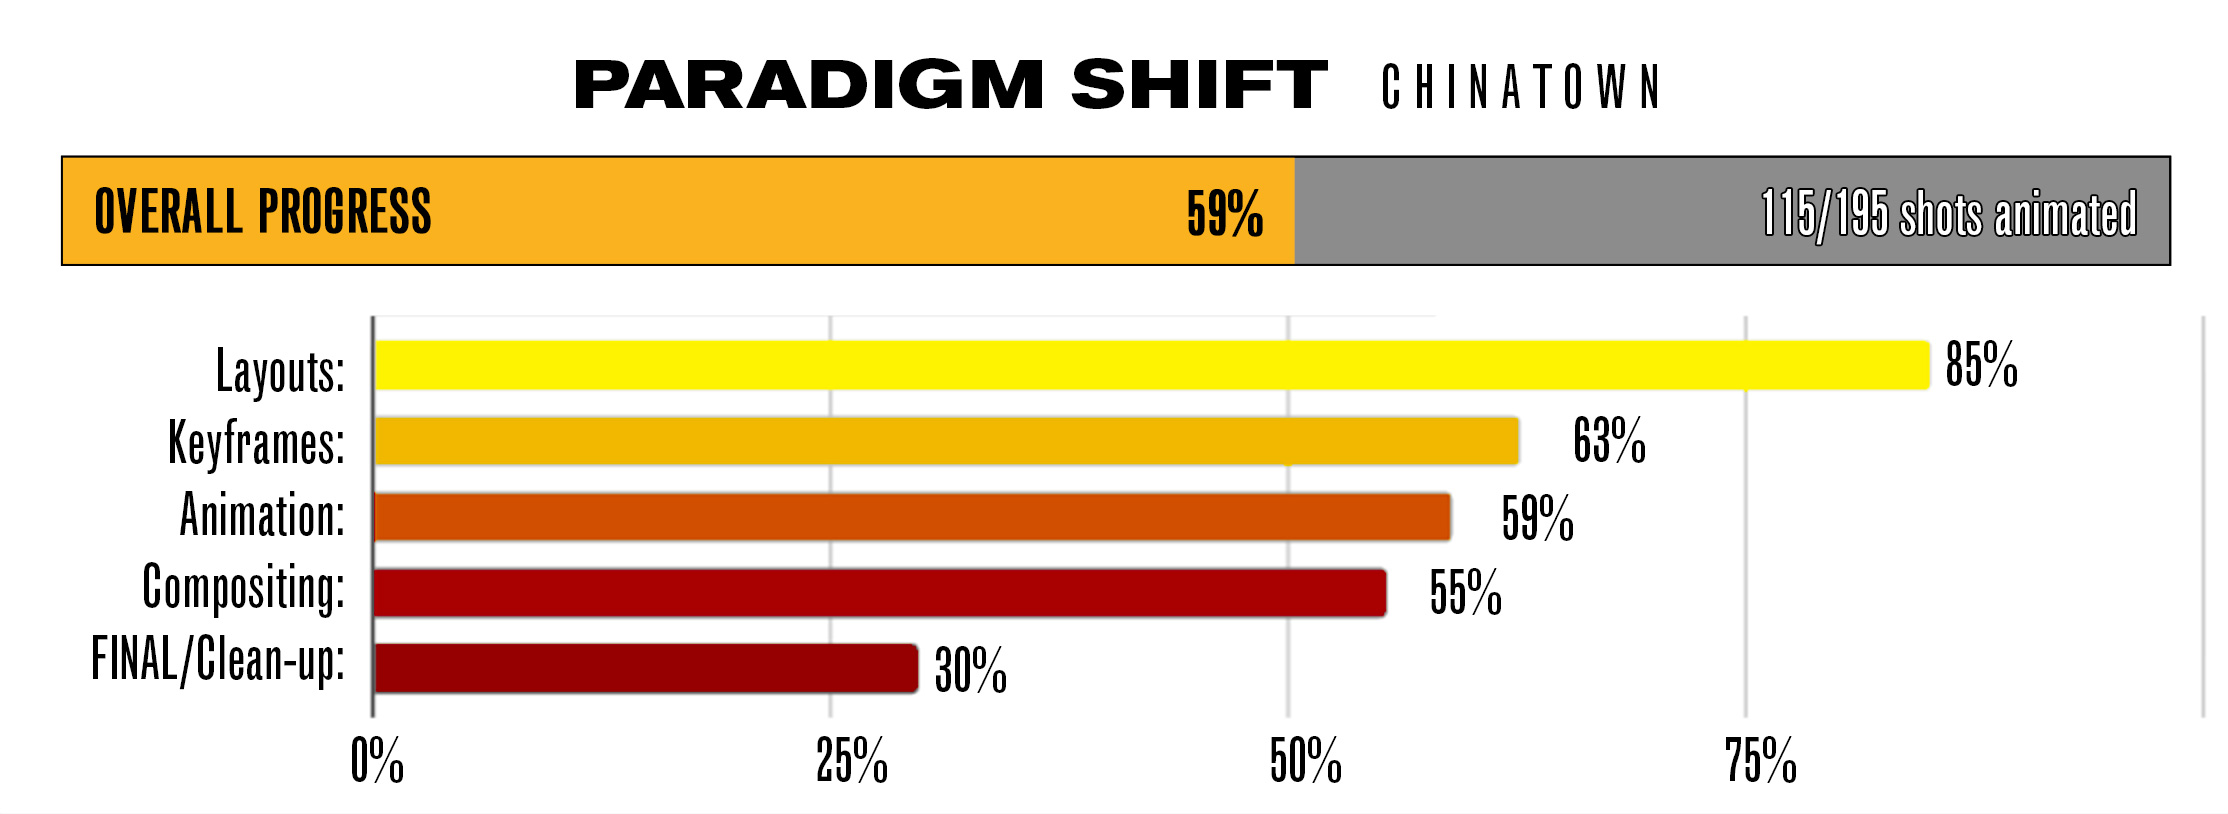
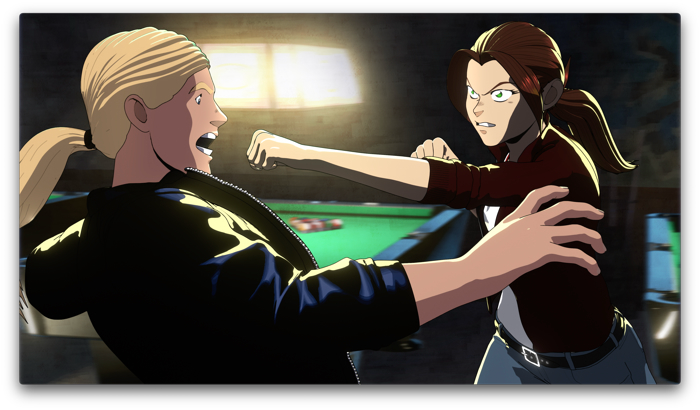
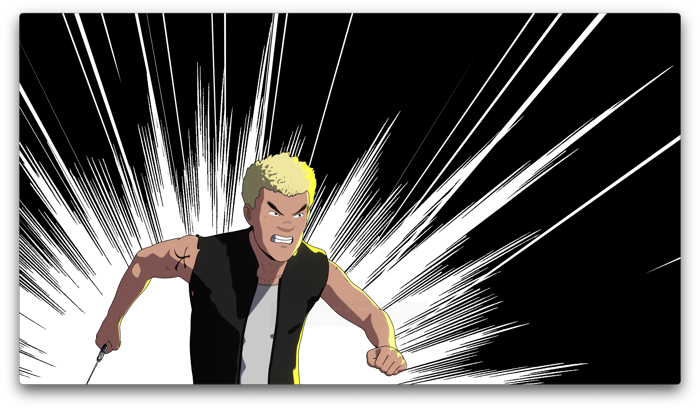
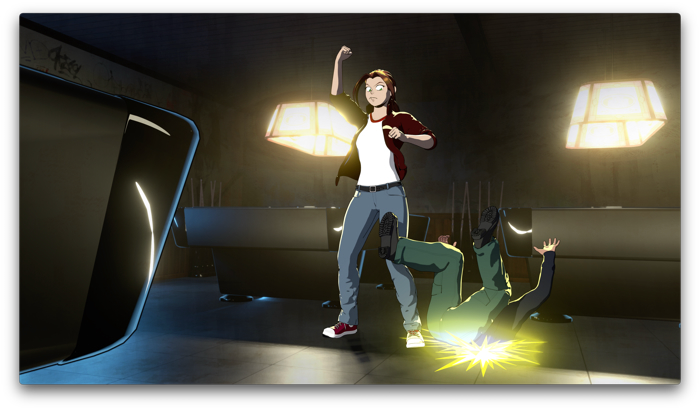
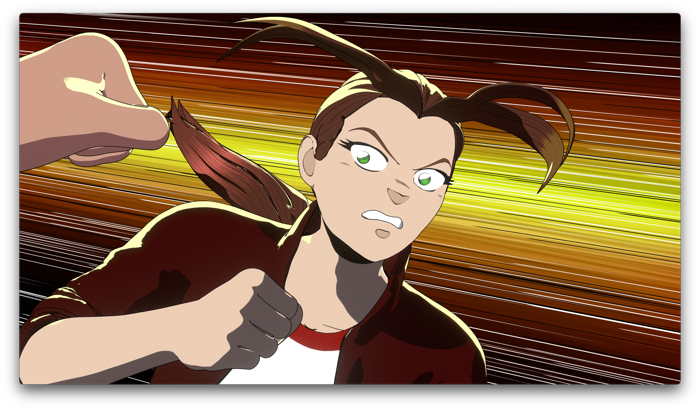
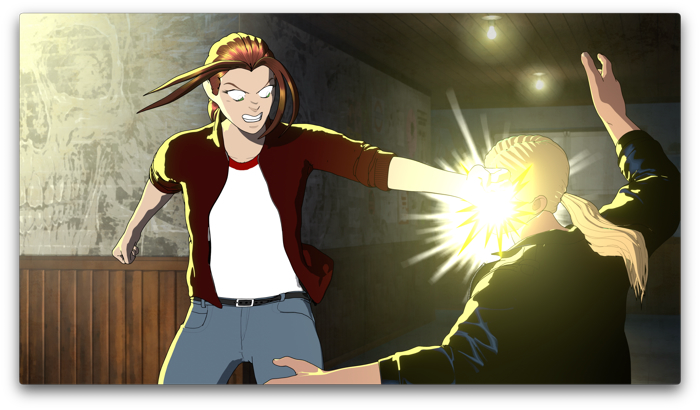
Principle animation on the film is now about 60% complete! We’ve now completed animation and compositing for three full scenes, and I’m about 80% complete on a fourth (out of nine scenes total for the film). These have all been the big action scenes at the end of the film. Nina has completed clean-up for the first of these (the big kung fu fight!) and is moving forward onto the next in the pipeline. Alexander has started in on the sound design as well. As you can see from the chart below, we’re now solidly past the halfway point in production, now!
So to celebrate, here’s a sneak peek of the big kung fu fight scene!
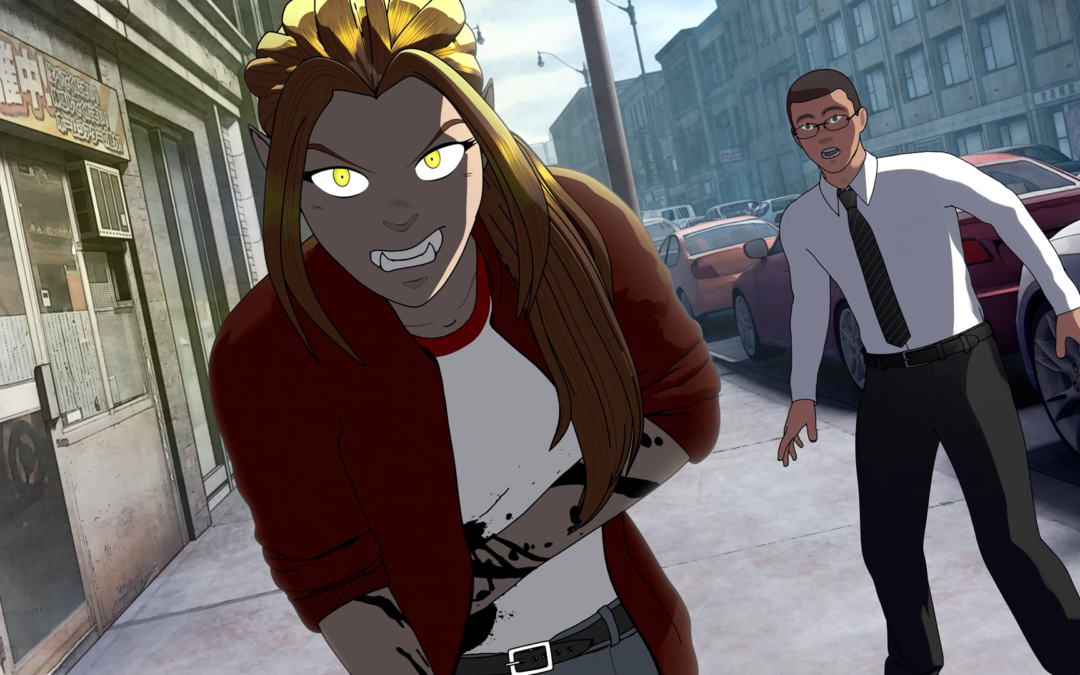
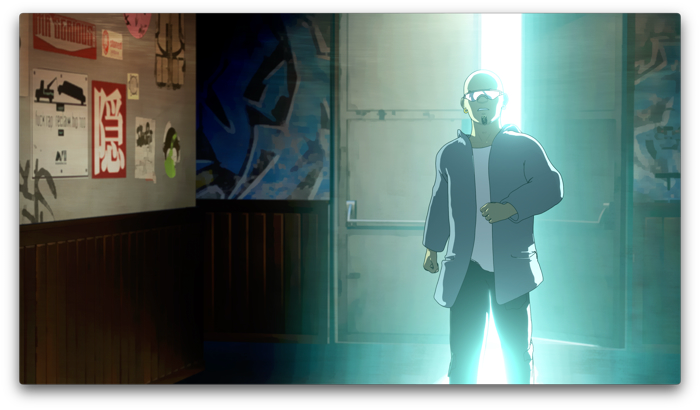
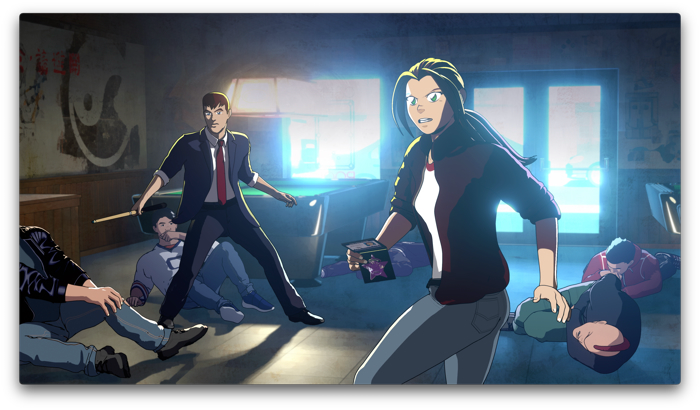
I know some of you are wondering what’s going on with the production (you know who you are!), since it’s been a minute since I last updated. No worries, I’ve been animating away behind the scenes pretty much constantly since the last update, and there’s been a ton of progress! Since finishing the principle animation for the big Kung Fu fight back in May, I’ve been working on all the action scenes that follow—from Kate getting shot through the chase through the streets of Chinatown. I’ve just begun animating the finale in the grocery store, and should have that completed by the end of August. That will get us to well over the halfway point on principle animation (116 out of 191 shots total or about 60%)
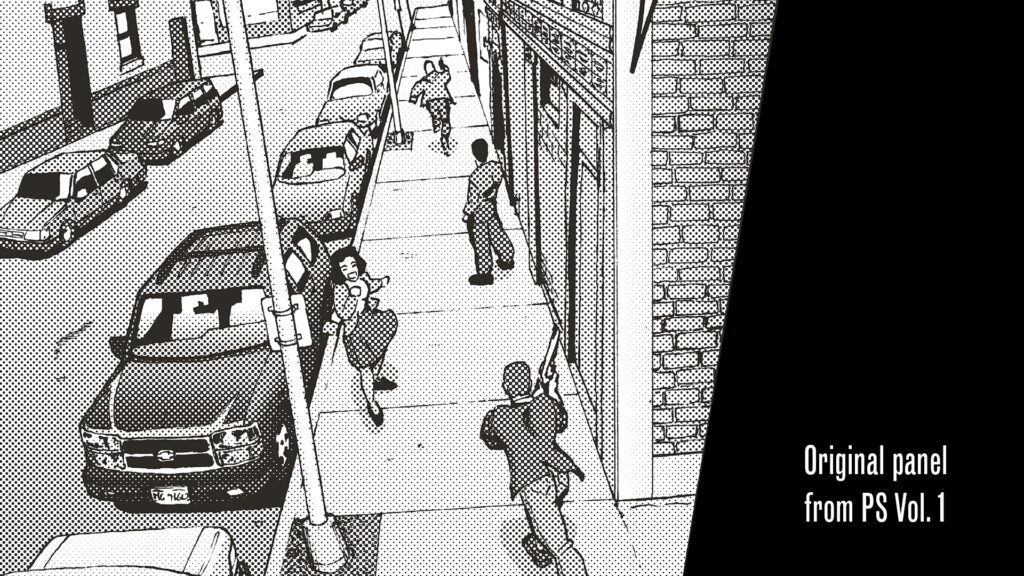
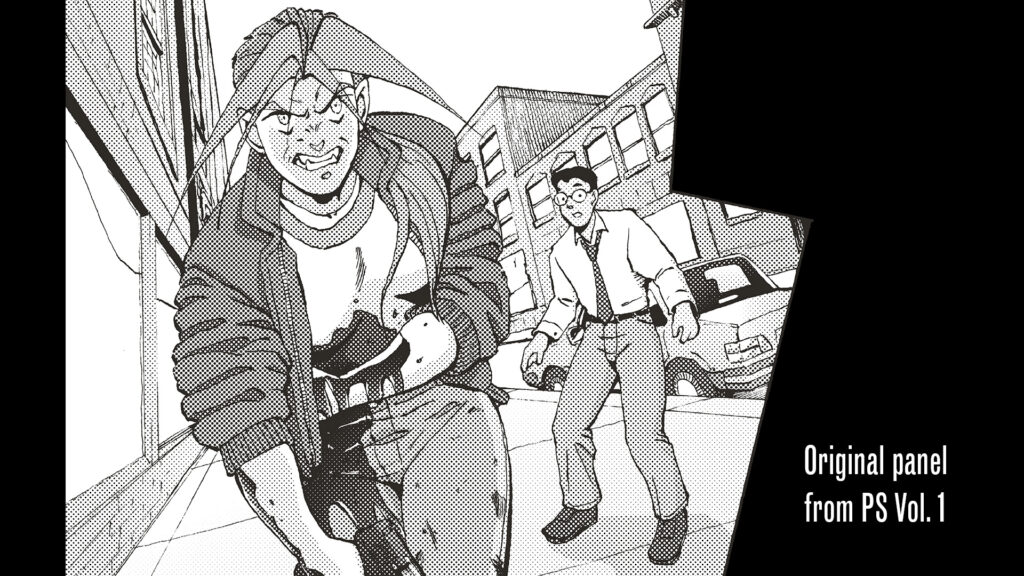
Rendered shot from Chinatown. (Click to view in HD) – This one was extra fun. I remember picturing how this shot could be animated waaaay back when I drew it in the year 2000!Original panel from PS. Vo.l 1Rendered shot from Chinatown. (Click to view in HD)Rendered shot from Chinatown. (Click to view in HD)
Why am I animating the second half of the film first? Great question! The answer is that James Oliva, our casting and voice director has been editing down the dialogue audio, and is on track to delivering that to me in the next couple of weeks. Working on these action scenes first has allowed me to make significant progress on the film without having to pause and wait for the voice tracks. Once I have those in hand, I’ll be able to go back and work on the all the dialogue-heavy scenes in the first half of the film.
And while I’m moving forward with animating these new scenes, Nina has been working on cleanup for the Kung Fu fight, and Alexander has started work on the sound design. So, we’re making definite progress!
And one last thing—I’ve also got some other big news: I’ve been selected to give a talk about my animation at this year’s Blender Conference this fall! I’ll be speaking about my journey from comics to animation, the making of Restless Sleep, and everything I’ve learned leading up to making this film. It’s a huge honor, and I’m really excited about it!
I’ll try not to wait so long before the next update—probably when I finish up the gunfight scene next month. Thanks for sticking with me!
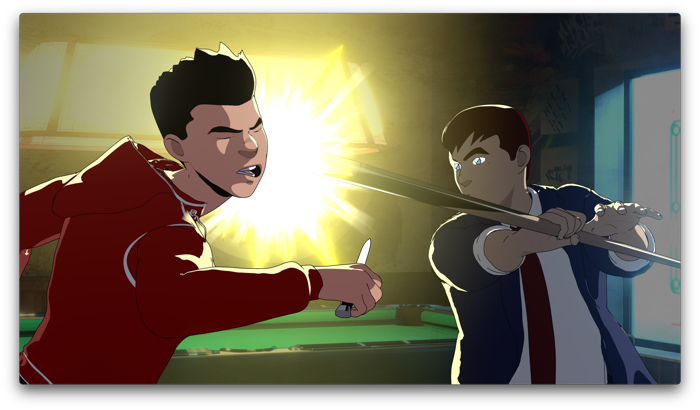
It’s been busy couple months. I’ve been hard at work animating the film. Back in May, I decided to start with the most challenging scene in the film—the big kung fu fight!
I started with this one in part because we’re still finalizing the dialogue recordings with the cast, and there’s minimal dialogue in this scene. However, I also knew this was going to be the most difficult scene to animate in the whole film. Up to eight characters on screen at once, tricky lighting, and over forty shots for less than a minute of footage. I knew it was going to be a technical challenge, but also a ton of fun to animate. I estimated it would take about a month to complete.
Dear reader, it took two.
The animation itself was pretty straightforward. It took a couple of weeks to get all the initial keyframes done for all the shots, but then I needed to work out the rendering. That’s where things initially started to bog down. While render times weren’t a problem (even the most complicated renders only took 20-30 minutes for an entire shot layer), I quickly discovered the the lighting situation for the scene was more complicated than my character rigs could handle easily.
However, before diving in on fixing all that, I decided to finish out the animation by going from the “keyframing” phase where basic poses and timing is worked out, to “tweens” where the in-between frames are added to smooth out the motion. You can see the difference between the two here for this shot:
KEYFRAMES:
TWEENS:
Thankfully going from keyframes to tweening is pretty straightforward and really fun. In the case of the film, I’m animating on “2s” which is a fancy way of saying I’m animating at 12 frames per second (fps). The film itself is 24 fps, but I’ve found that limiting the characters to half that really helps “sell” the 2D animated look.
If you’re not familiar with how 3D animation works, there’s two main parts to the process:
ONE: ANIMATION — Pose the characters, props, and move the camera in 3D space to set up the movement:
TWO: RENDERING — Set up the lighting and render out the final artwork with final colors and lighting, and in this case, ink outlines.
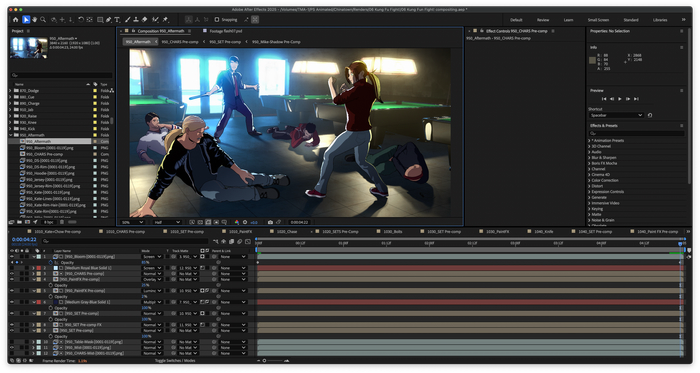
While in some cases you can get by with rendering out a single image with the characters and background completely finished, in practice this is rarely how it works in real life. In the case of PS Chinatown, I’m rendering out a minimum of two layers: one for characters, one for backgrounds, but for the more complicated shots, I’m rendering out literally DOZENS of layers and then assembling them in Adobe After Effects. I even figured out a way to fake a painted look for the backgrounds.
Setting up a shot in Adobe After Effects. This shot took over 80 layers to achieve! 28 of which had to be rendered out of Blender individually.
Once I was happy with how the movement was looking, it was time to turn to rendering, and fix all the problems I had with the first render pass.
After getting an initial render test done for the entire scene in early April, I realized that I needed to make some improvements to the characters to really make it look great. The main culprit was a technique called “rim lighting” when you use a bright light behind a character or object to “pop” it out from the background. The initial character rigs supported this, but the results were a little clunky in the most extreme lighting conditions. In short, I just did not like the results:
Initial render test of the the most complicated shot in the scene. Looks okay, but… the lighting on the characters left something to be desired. And the hair on ponytail guy is awful!
So, I went back to the drawing board and re-thought how to implement a better scheme for creating the lighting on the characters. The answer ended up being incredibly techinical, involving editing the controls for lighting on a limb-by-limb basis (head, torso, arms, and legs), and then creating a separate render layer that can be easily edited in After Effects. Suffice to say it took some work and about a week to implement on all the characters. However, in the end the results were worth it!
Final render of the shot. Background and characters more integrated. However it took implementing an entirely new rim lighting system on the character rigs, which took about a week to figure out. I also had to model new hair for ponytail guy.
However, during the rendering process, I had to completely revamp the work Nina and I had done in After Effects after the first round in late March/early April. And it took a couple of weeks to get all the shots updated and re-rendered. During this time I decided to bite the bullet and purchase a new M4 Max Mac Studio to replace my aging iMac I had been using as my desktop machine because it was starting to choke on the Blender scenes I’d set up (but that’s another blog post entirely.) Thankfully, the new machine has arrived and has sped up the rendering process tremendously (in part because I now easily render in the background while while continuing set up shots either in Blender or After Effects. Heaven!)
I finished rendering and compositing the last shot back in May, and have since passed all the shots along to Nina for cleanup. I’ve been working on action scenes that follow this ever since. I just started in on the gunfight finale and should be finished with that in August. I’ll update y’all on all that later!
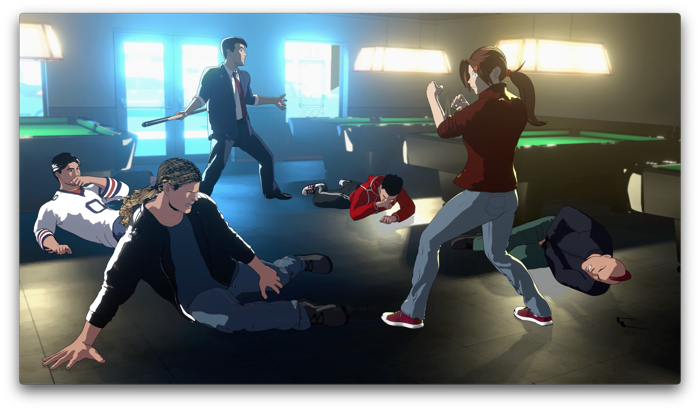
Anyway, here’s a few stills from the scene. Enjoy!
Hey, all! It’s been a couple of weeks since the Kickstarter ended, and while I took a little break from updating to recover not only from the campaign, but also a nasty cold and Thanksgiving, pre-production for the film has been humming along in the background.
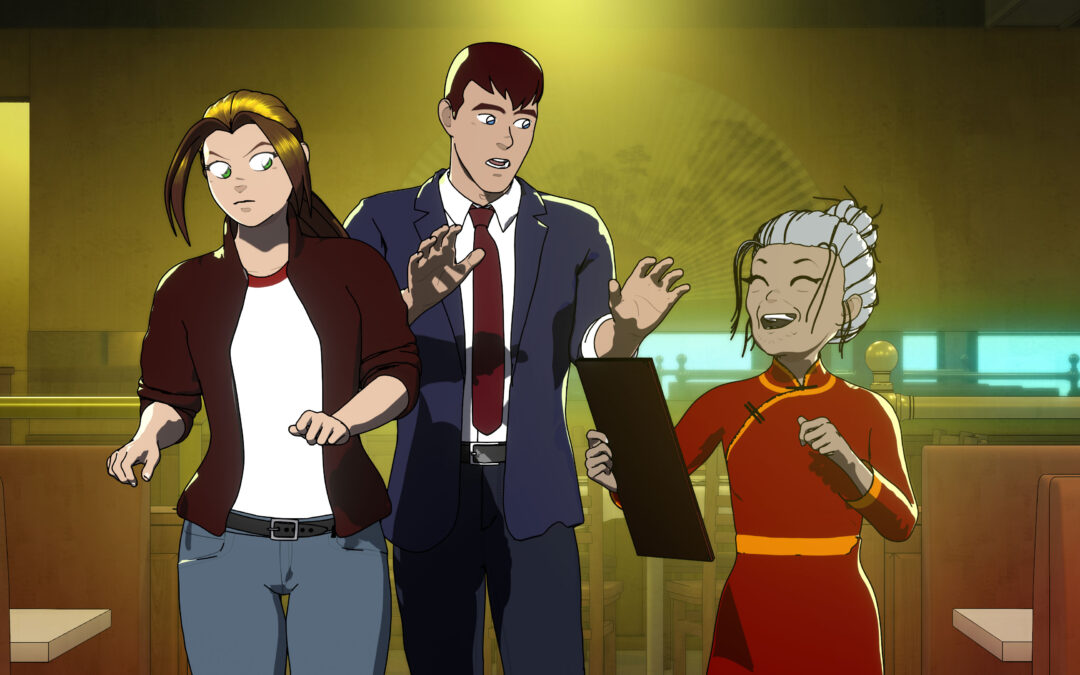
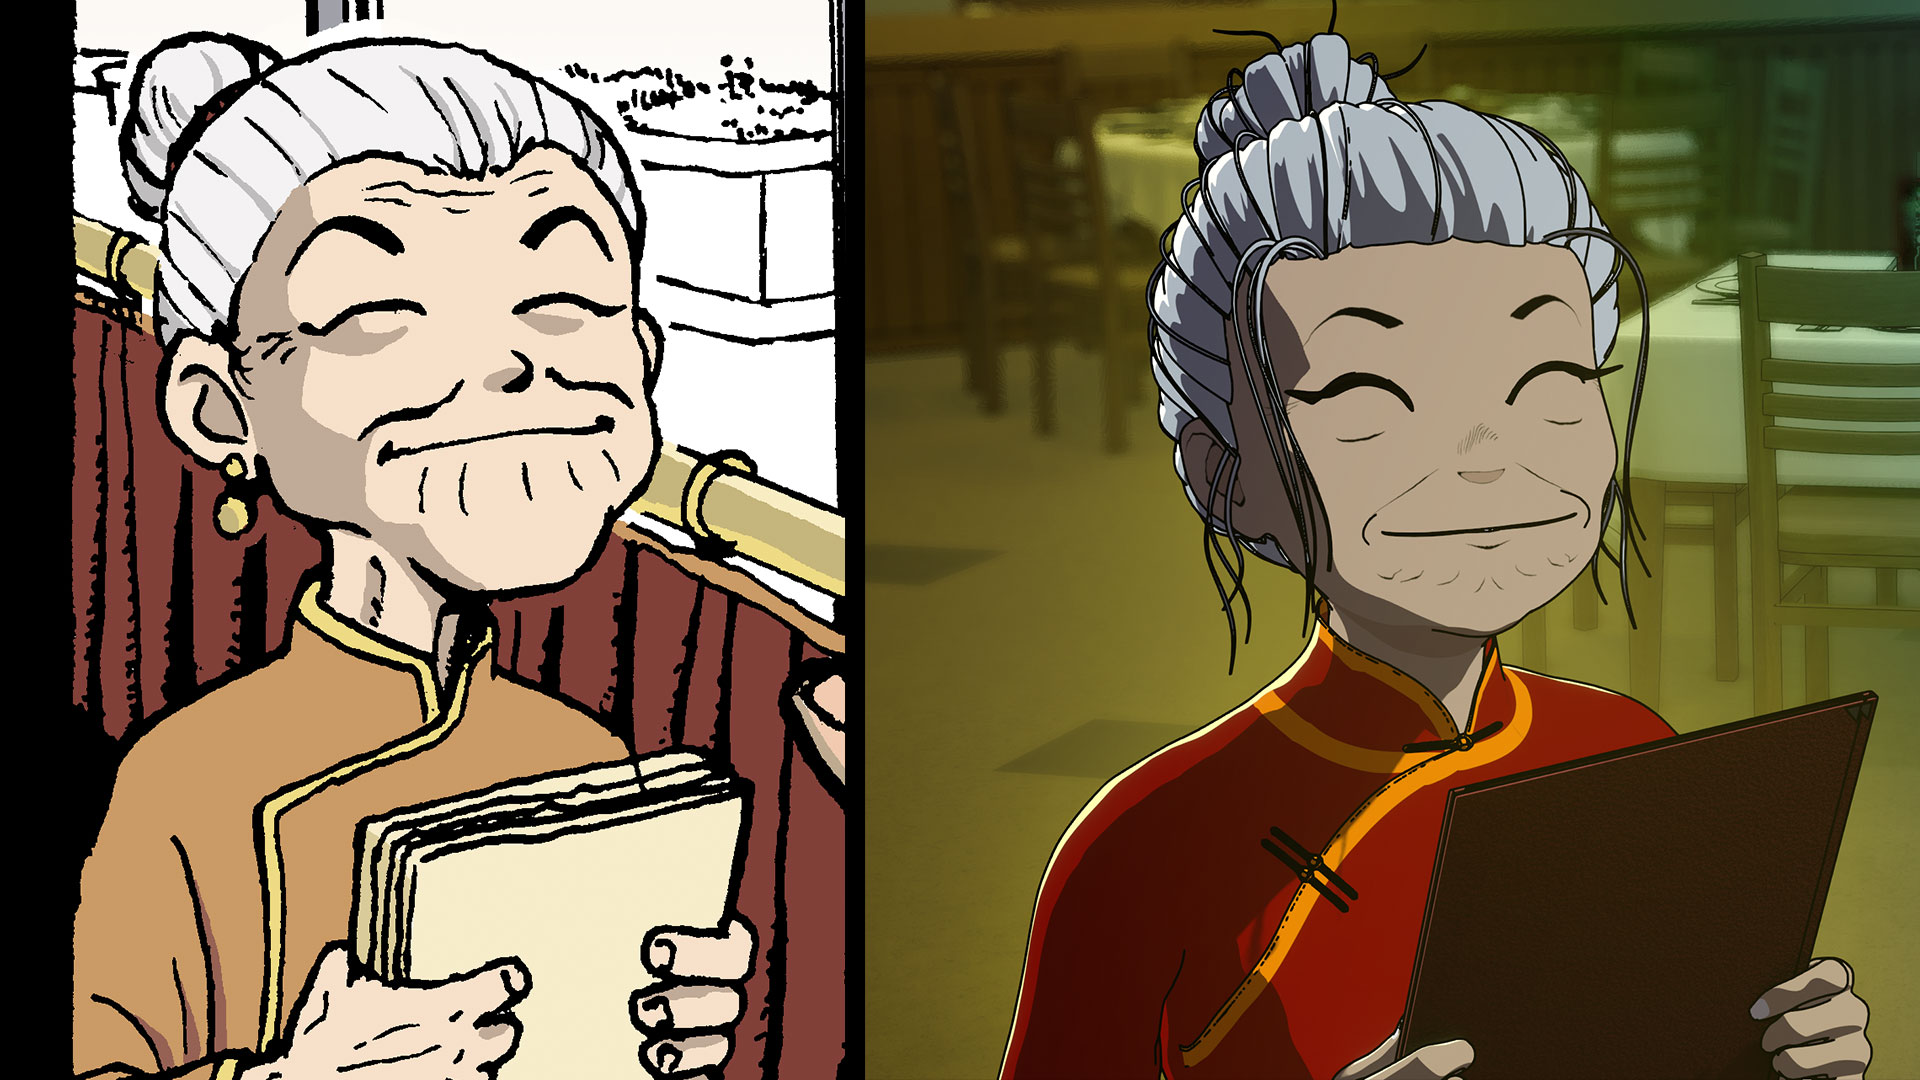
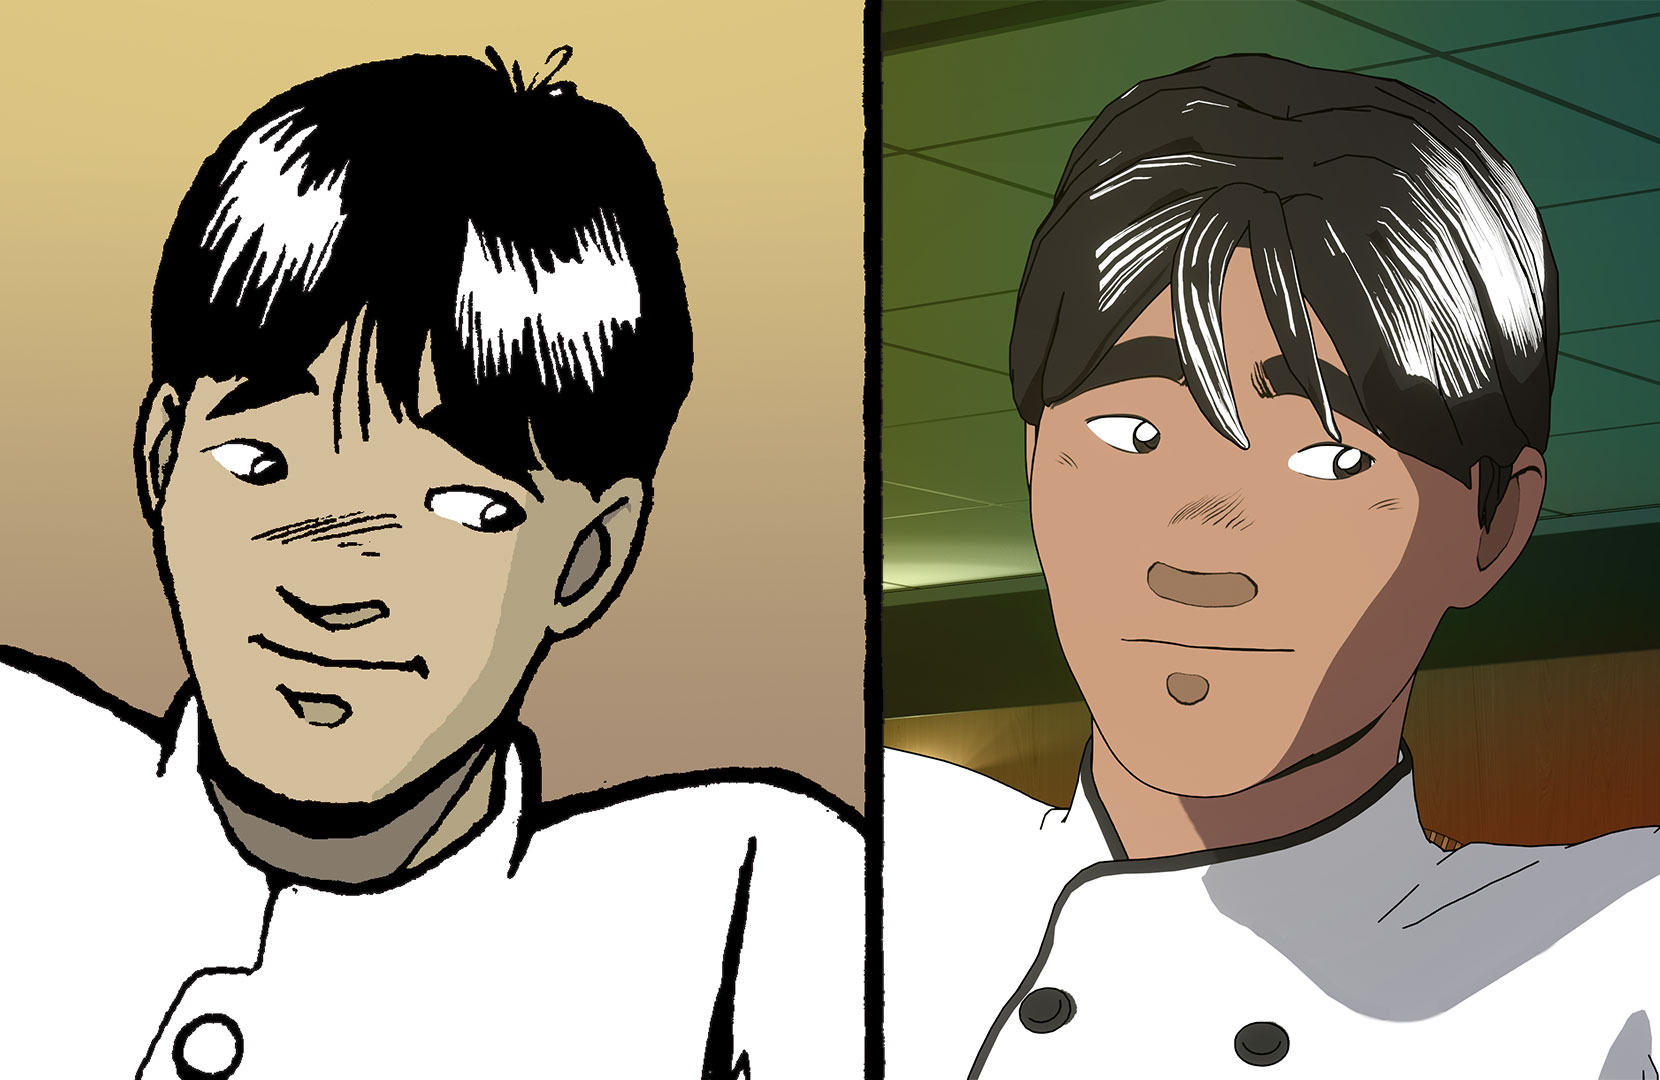
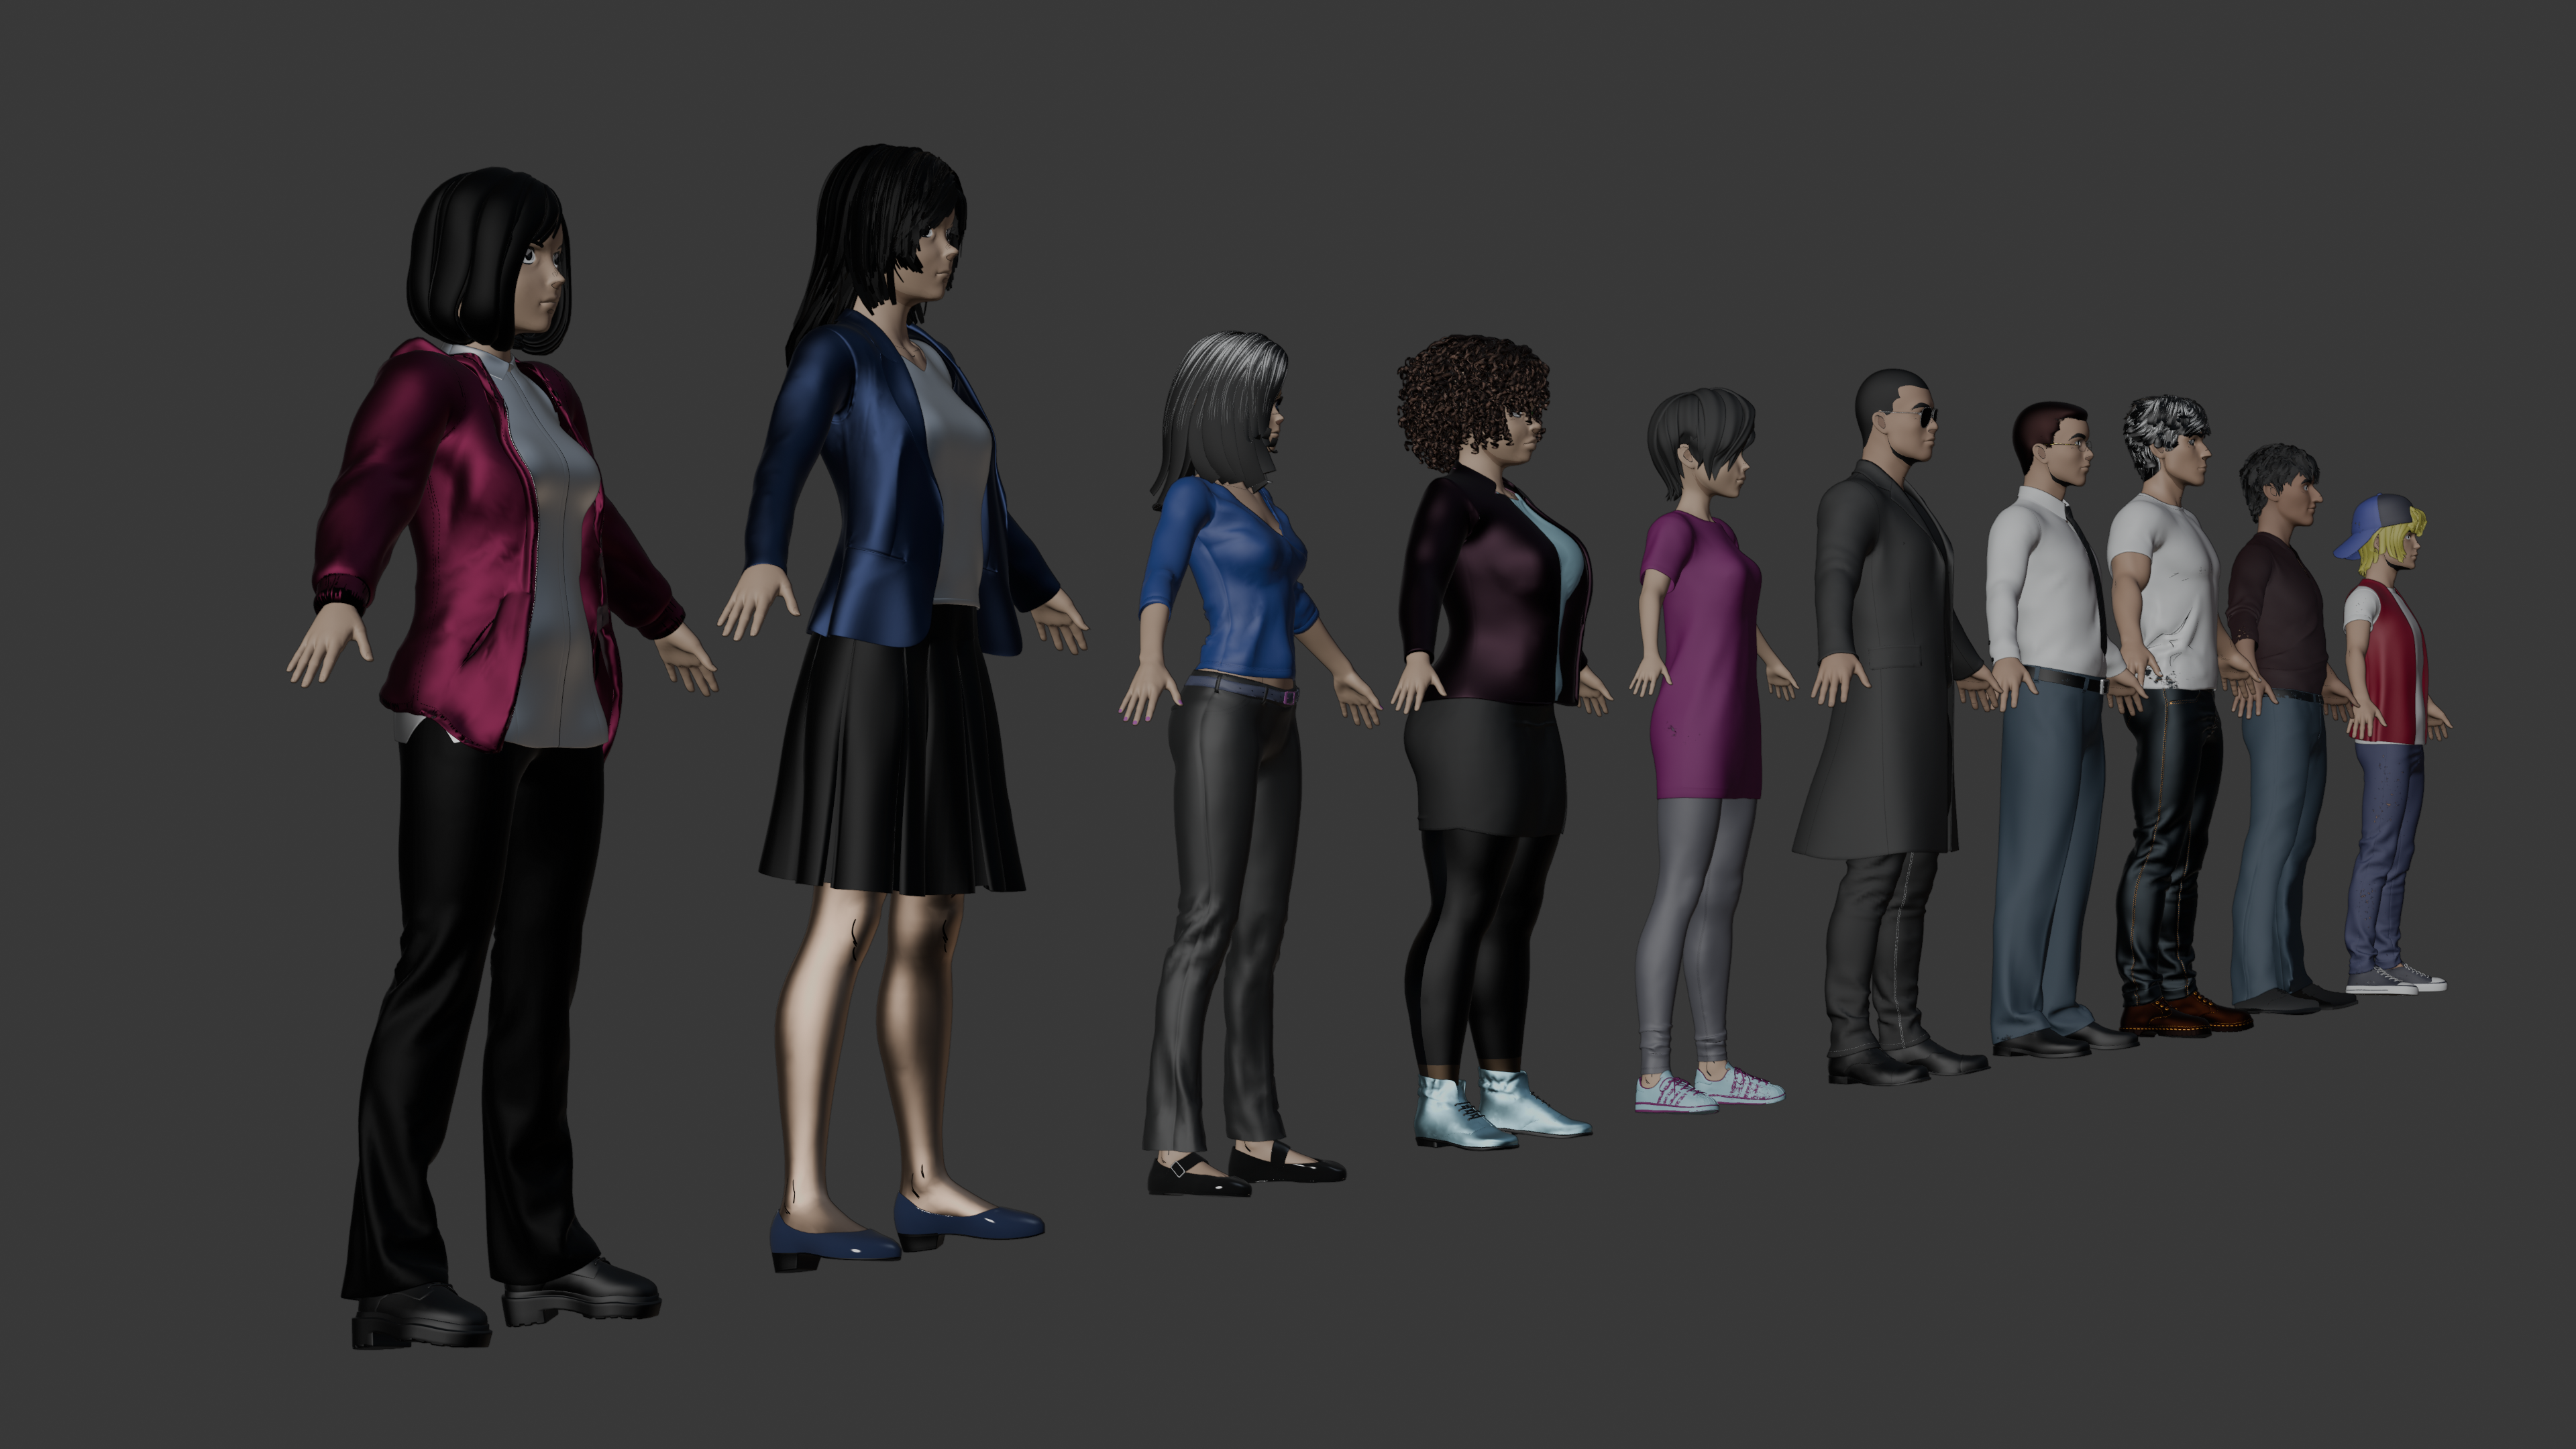
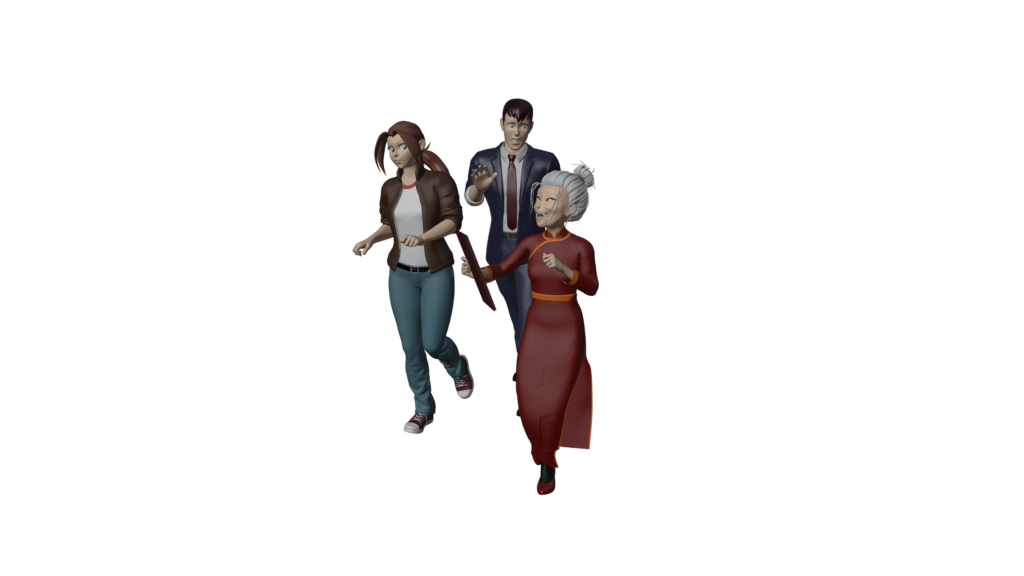
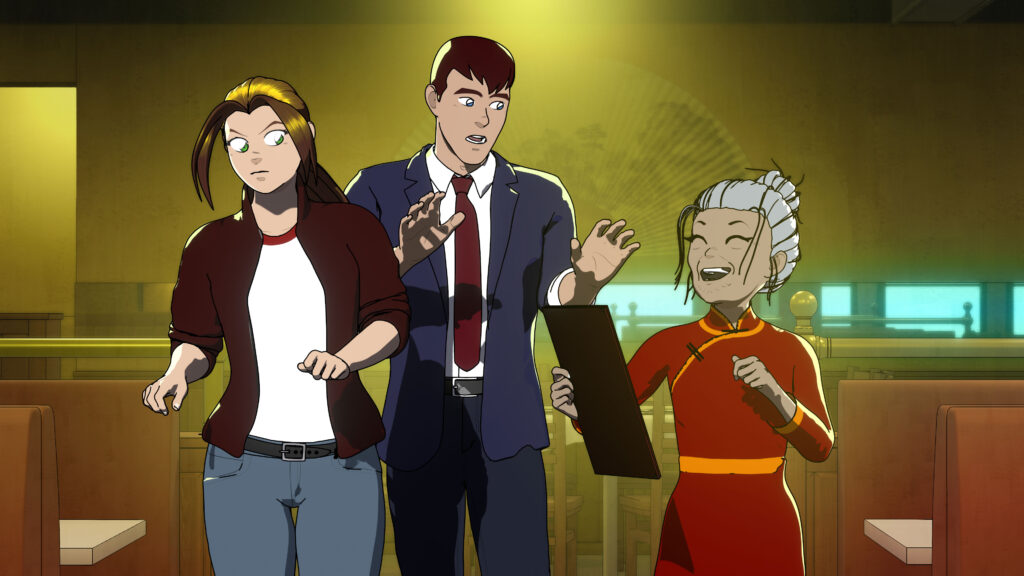
First, we’re nearly finished with making all the character models! I put the finishing touches on Mike’s friend Kuan and the restaurant Hostess, and then moved on to working on creating background characters that will populate the streets and the restaurant scenes. I also got the first of our “special guests” completed—more on him soon!
Test render of the restaurant’s HostessTest render of Mike’s friend Kuan.The models for our “extras” for the street and restaurant scenes as seen in the Blender viewport, but not yet rendered.
To create all these background characters, I have two “universal rigs”—the same that I used to create the gang members last summer—one male, one female. While there are some generic outfits I can use, I customized these characters with clothes and hair purchased from DAZ3D and exported to Blender. There’s also a few characters that have been repurposed from previous projects and modified to suit this film.
Between all these new characters, plus the original cast, that puts the total at 20 custom characters for the film! If we had to make all these characters from scratch, that could have easily taken over half a year, but using this streamlined process, we’re able to create a bunch of characters in a week or two. Now, I’ll be the first to admit they are not as polished as the work of some of the other Blender pros at work out there, but they will more than do for the purposes of this project, and it was worth the tradeoff for the speed of creation. Perhaps in the next project we’ll be able to make use of some of those pros out there!
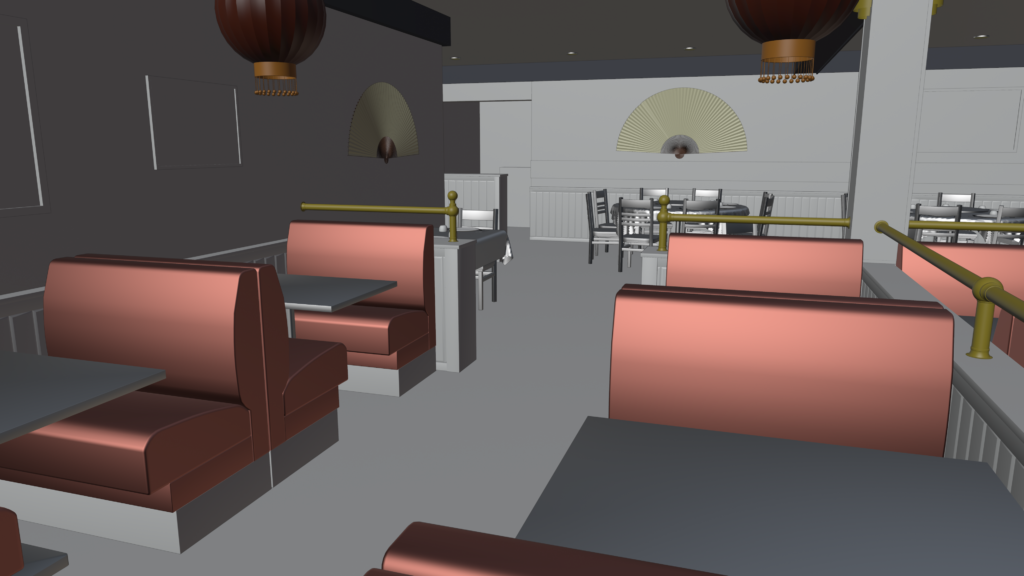
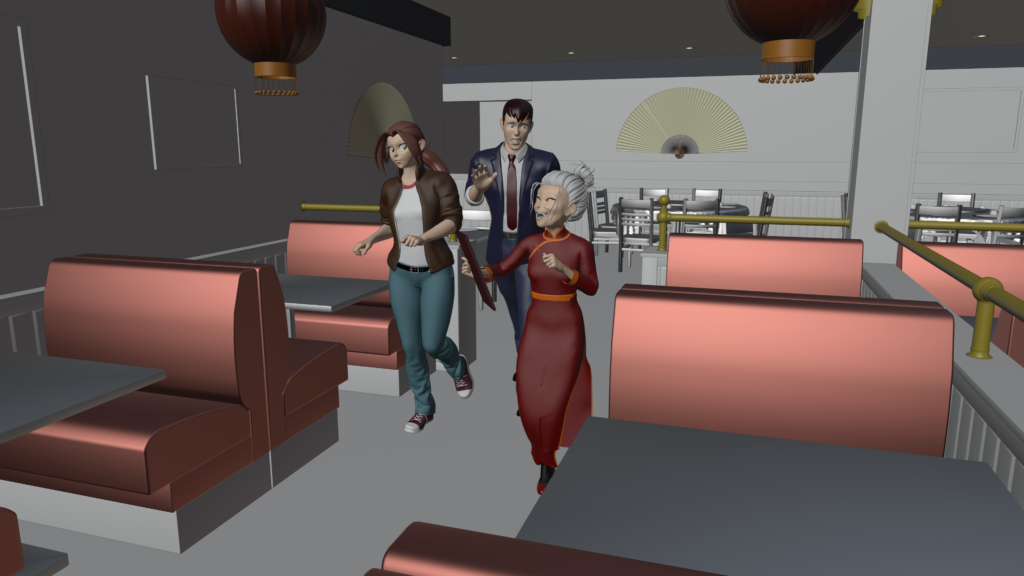
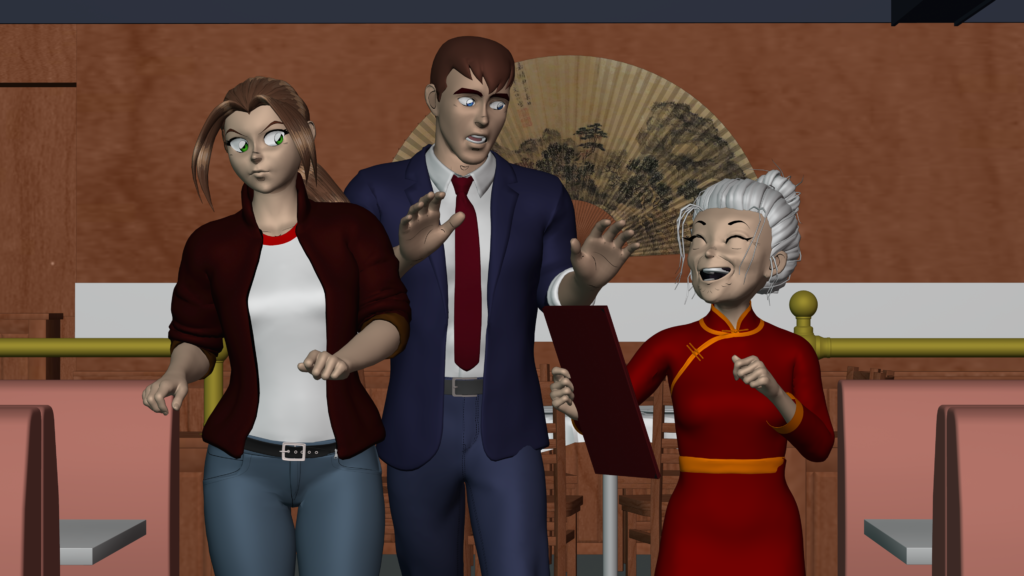
In addition to making characters, I’ve also proceeded in setting up the layouts for the film, starting with the restaurant scene. “Layout” refers to process of setting up the files in Blender with all the sets, props, characters, lights, and special effects that will be needed for the scene, and then determining the basic posing of characters and finding camera angles for each of the shots. I also use this process to create test renders from a few key shots to decide on the look of scene, especially the lighting.
Here’s what that looks like:
Layout interface in BlenderSet modelCharacter modelsCombined modelsAnimation interface in BlenderPreview of the shot in the cameraFinal composited test render.
It’s been a few weeks in the making, but we can finally announce we’ve officially signed our voice cast!
First off, I’m excited to announce we’ve landed Dayeanne Hutton to play Kate!
Dayeanne’s a veteran video game voice actor from the Life is Strange series, and starred in the Emmy Award-winning show, Emma Approved. Her range is deep and broad, we’re really happy to have her on board!
Next, we’re delighted to announce that we’ve landed the incredibly talented Zach Valenti to be Mike Stuart’s voice!
For our supporting cast, we’ve landed Peter Hu to be the voice of Kuan, and a member of the White Dragon gang. Peter is also a podcast fiction veteran. And Gloria Tsai will be lending her voice to our Hostess. Both will also provide some additional background voices for film.
Welcome to the team, everyone! We’re so lucky to have you!